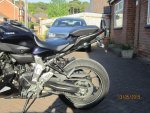
Right then, finally as promised here are some details and pics of what I had to do in order to fit my Ventura luggage bracket.
For those without a tail tidy it is a little easier and for those with an R&G (I think) tidy this was my solution.
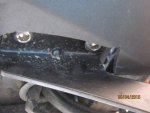
Here is a pic of the easy to fit rails and the not so easy to fit bracket:
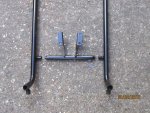
The front of the rails (out of view in the photo) should be easy to mount to the rear footpeg assembly.
The rear of the rails should also be easy to mount/bolt onto the bracket when it is in place.
Racks and grabrails are then a very simple/easy slot in/out into the rails in the holes at the bottom of the photo.
The 4 holes in the bracket mount to the same location as the original number plate holder / tail tidy bracket which are easy to find once the rear plastics / side panels are removed.

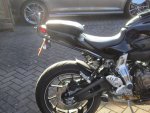
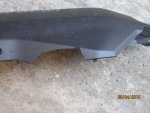
The rear plastics (both sides) then need a section to be cut out of them in order to fit the Ventura bracket. I ended up cutting a little more off then the photos show to make my life easier when fitting the bracket.
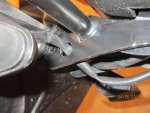
On my bike the tube on the rear bracket fouled the tail tidy metalwork that supports the number plate and indicators.
To get it all to fit I had to bend out the legs of the tail tidy and then file the mounting holes into slots to re-align them.
I also had to cut and file a section out of the tail tidy metalwork so that the Ventura rear bracket would sit in the correct position. As the tail tidy only supports the number plate and indicators it doesn't need to be particularly strong as it's not supporting much weight (I hope).
I hope this makes sense and that I've not missed out anything important but it should be pretty easy to do if I can do it.
The cut plastics don't show - unless you are in the habit of looking under your bike and even then aren't particularly obvious.
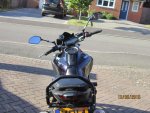
Once done it is easy to remove the rails (and just leave the bracket in place) if you think the rails unsightly but does give a very good method of carrying luggage (in my opinion).